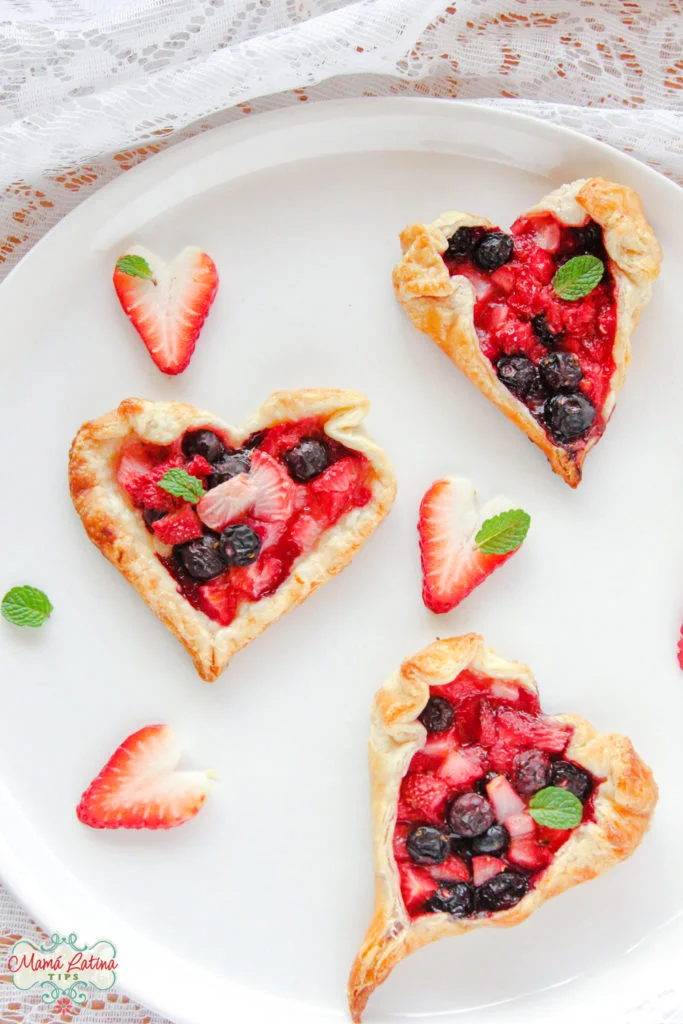
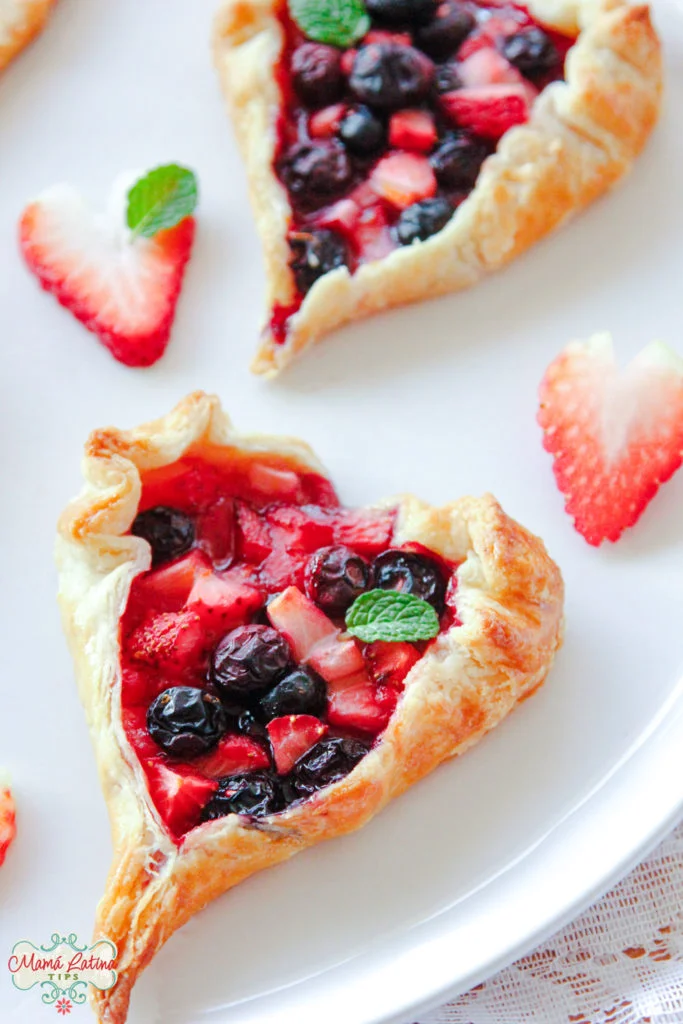
These heart shaped, Orange Berry Rustic Tarts bring the sweetness of Valentine's Day to life. Colorful, light to the touch, crisp to the ear, and sweet to the tongue, their baked goodness fills the home with sweet, fruity fragrance and the warmth of crackling pastry.
They’re like baked love, satisfying all the senses at once.
Valentine's Day, famous both for sweets and whispering sweet nothings, begs for just the right amount of sweetness. The sweetness in these tarts comes from the berries, the orange, and a little bit of sugar.
I like these rustic tarts. They are easy to make and don't need to look perfect, because, well, they’re rustic.
You can use a cookie mold if you like, but for these beauties you really just need your hands to fold the dough towards the center a little in order to hug the fruit.
A Word about the Dough
You want your dough flaky and buttery. If you don't have time to make it, go ahead and use store bought pie dough. But if you have more time, I really recommend making your own dough.
It's easier to make than you think, the secret is keeping your ingredients, especially the butter, cold. If you have a food processor, great, you'll have dough in minutes. If not, you’ll just need a pastry cutter or a couple of forks to mix the flour with the butter.
If you make these
Heart Shaped Orange Berry Rustic Tarts
Ingredients
For the Pastry
- 2 1/2 cups (310 gr) all purpose flour + a little more to dust your working space
- 1 tablespoon sugar
- 1 teaspoon salt
- 1/2 cup (250 gr) cold butter, cut into pieces
- 1/2 cup ice water
- 1 egg, for egg wash before baking
Or you can get store bought pie dough.
For the Filling
- 4 cups (600 gr or 20 oz) chopped berries of your choice
- 1/4 cup sugar
- 2 tablespoon corn starch
- Zest of two oranges
Tools
- Food processor or pastry tool
- Zester
- Plastic wrap
- Parchment paper
- Rolling pin
- 2-3 baking sheets
- Heart shaped mold (14 cm or 5.5 inches long) or stencil (get a heart stencil here)
Making the Dough
Place flour, sugar and salt in the food processor, give 2-3 pulses to mix.
Add half the butter and pulse approx 10 times. Add the other half of the butter and pulse until the mixture looks like rough sand.
Pour in half the water, pulse 3-4 times. Add the rest of the water and pulse 3-4 times more. The mixture should look barely wet, still sandy but when you take some in your hand and squeeze it should hold its shape.
Form a couple of balls with the pastry (please don't overwork it) and cover with plastic wrap. Take the rolling pin and roll the pastry (in the plastic) to flatten.
Refrigerate for at least 1 hour (making the dough in advance is better and you will save time on the day you make them).
Mix fruit with sugar, taste for sweetness and adjust if needed. Add corn starch and orange zest. Cover and refrigerate.
Take the dough out of the fridge and let it rest at room temperature for 10 minutes.
Pre-heat oven at 400 degrees F (approx 200 degrees C). Flour your work space and rolling pin.
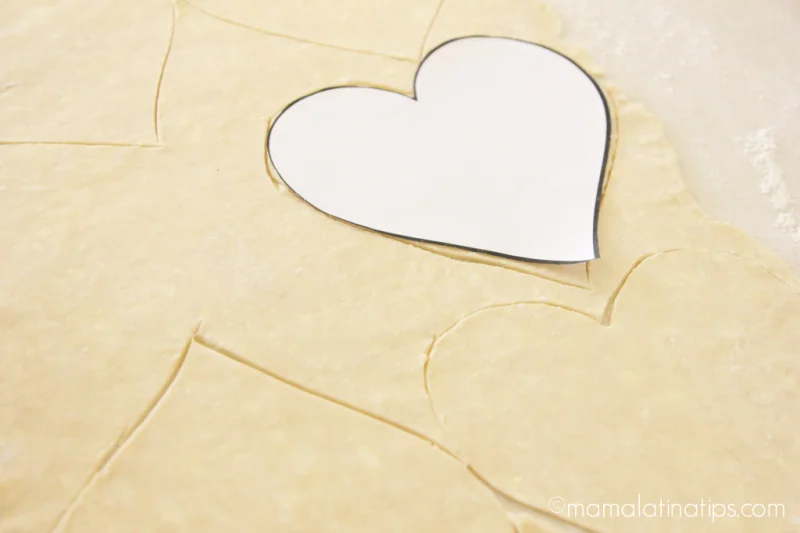
Roll the dough out until thin. Cut the hearts using the stencil or a cookie mold. Place the heart shaped dough on baking sheets lined with parchment paper.
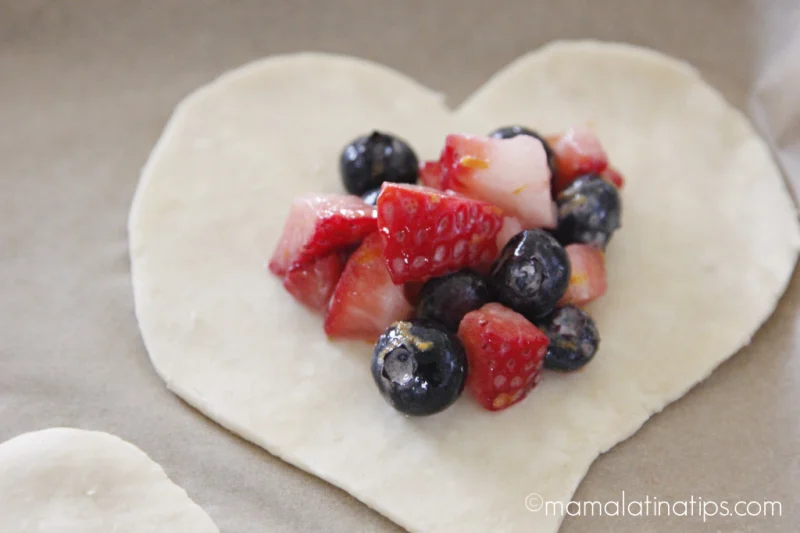
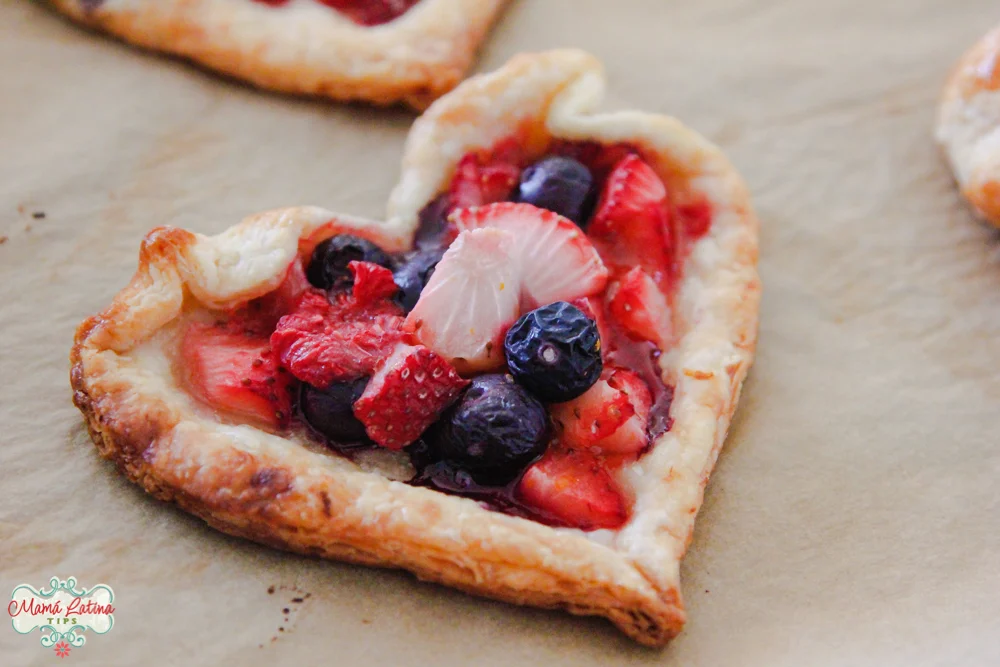
Place 2 tablespoons of the fruit mix in the center of each heart. With your fingers, pinch the dough at the bottom of each heart together. Then, gently fold the dough at the top of the heart to create a heart shape (See photos).
It's ok if it is imperfect.
In a small bowl, beat the egg just enough to combine the yolk and white and become homogenous. Lightly brush the egg wash on top of each pastry with a kitchen brush.
This will give it a shiny, golden color when baked.
Bake for 18-20 minutes or until the crust is golden brown.
More Sweet Ideas for Valentine's Day
Happy Valentine's Day
Enjoy!
Heart Shaped Orange Berry Rustic Tarts
Ingredients
For the Pastry
- 2 1/2 cups all purpose flour (310 gr) + a little more to dust your working space
- 1 tablespoon sugar
- 1 teaspoon salt
- 1/2 cup cold butter, cut in pieces (250 gr)
- 1/2 cup ice water
- 1 egg for egg wash before baking
- Or you can get store bought pie dough.
For the Filling
- 4 cups berries of your choice chopped. (600 gr or 20 oz)
- 1/4 cup sugar
- 2 tablespoon corn starch
- Zest of two oranges
Utensilios
- Food processor or pastry tool
- Zester
- Plastic wrap
- Parchment paper
- Rolling pin
- 2-3 baking sheets
- Heart-shaped mold – 14 cm or 5.5 inches long or stencil (get a heart stencil link on notes)
Instructions
Making the Dough
- Place flour, Truvía Spoonable and salt in the food processor, give 2-3 pulses to mix.
- Add half the butter and pulse approx 10 times. Add the other half of the butter and pulse until the mixture looks like rough sand.
- Pour in half the water, pulse 3-4 times. Add the rest of the water and pulse 3-4 times more. The mixture should look barely wet, still sandy but when you take some in your hand and squeeze it should hold its shape.
- Form a couple of balls with the pastry (please don't overwork it) and cover with plastic wrap. Take the rolling pin and roll the pastry (in the plastic) to flatten. Refrigerate for at least 1 hour (making the dough in advance is better and you will save time on the day you make them).
Making the Tarts
- Mix fruit with Truvía Spoonable, taste for sweetness and adjust if needed. Add corn starch and orange zest. Cover and refrigerate.
- Take the dough out the fridge and let it rest at room temperature for 10 minutes.
- Pre-heat oven at 400 degrees F (approx 200 degrees C). Flour your working space and rolling pin.
- Roll the dough out until thin. Cut the hearts using the stencil or a cookie mold. Place the heart shaped dough on baking sheets lined with parchment paper.
- Place 2 tablespoons of the fruit mix in the center of each heart. With your fingers, pinch the dough at the bottom of each heart together. Then, gently fold the dough at the top of the heart to create a heart shape (See photos). It's ok if it is imperfect.
- In a small bowl, beat the egg just enough to make the yolk and white combined and become homogenous. With a kitchen brush, lightly brush the egg wash on top of each pastry. This will give it a shiny, golden color when baked.
- Bake for 18-20 minutes or until the crust is golden brown.
Video
Nutrition
Notes
Did you make this recipe?
Tag @mamalatina on Instagram and hashtag it #mamalatinatips
- Creamy Coffee Flan Recipe - May 14, 2024
- Cantaloupe Agua Fresca Recipe - April 30, 2024
- Pineapple Agua Fresca Recipe (Agua de Piña) - April 27, 2024
